Blog
How to Achieve the Ideal Remote Shutter Setup for Long Exposure and Group Photography
In the world of photography, achieving the perfect shot often requires more than just your camera and lens. Certain situations, such as long-exposure shots or group photos, require specialized tools and techniques to ensure you get the best possible results. One such tool that can significantly improve your shooting process and enhance the quality of your images is the remote shutter. Whether you’re capturing the magic of a starry night or arranging a group portrait with perfect timing, a remote shutter setup can help you achieve a smooth, stable, and professional shot.
In this article, we’ll explore how to set up and use a remote shutter for long-exposure and group photography, explaining the benefits of using one, the types of remote shutters available, and the steps to ensure that your setup is ideal for each scenario.
1. Why Use a Remote Shutter for Long-Exposure and Group Photography?
A remote shutter release serves as a crucial accessory for photographers who want to ensure steady, clear images, particularly when shooting in tricky situations. Here’s why a remote shutter can be especially beneficial for long-exposure photography and group photography:
a. Minimize Camera Shake
When taking long-exposure shots, even the smallest movement can result in blurred images. Pressing the shutter button can cause the camera to slightly shift, leading to unintended motion. By using a remote shutter, you eliminate the need to physically touch the camera, ensuring that there is no shake, no matter how long the exposure is.
- Tip: For night photography, such as capturing star trails or long-exposure cityscapes, a remote shutter allows you to start the exposure without disturbing the stability of your camera.
b. Accurate Timing for Group Photography
Group photography often requires perfect timing to ensure everyone is in position and looking their best. With a remote shutter, you can trigger the shot without running back to the camera, allowing you to join the group or ensure that you’re in frame for self-portraits.
- Tip: A wireless remote shutter is perfect for group photos, as it allows you to stand with your subjects or even control the shutter from a distance, making the setup more fluid and less stressful.
c. Enhanced Precision for Self-Portraits and Timed Shots
In situations where you’re in the photo, using a remote shutter is an essential tool. It ensures that the shot is timed correctly and eliminates the need to rely on a self-timer, which can sometimes cause delays or misfires.
- Tip: A remote shutter with a timer function is ideal for creating self-portraits or when you want to join a group photo without any hassle.
2. Types of Remote Shutters
There are several types of remote shutters available, each offering different features and benefits. Here are the main options to consider when setting up a remote shutter for your photography needs:
a. Wired Remote Shutters
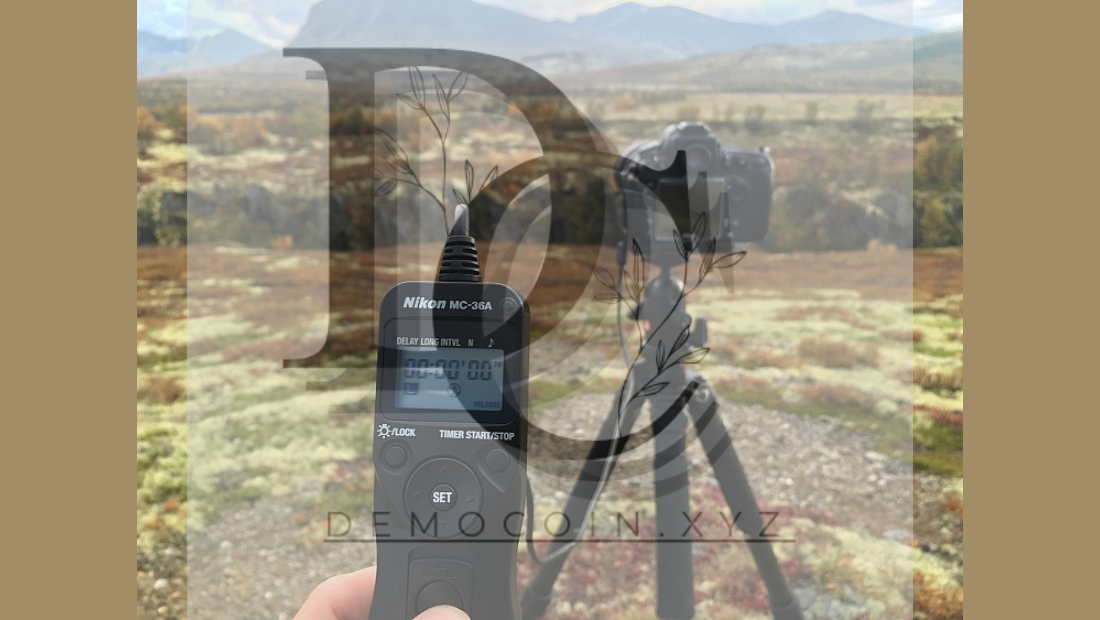
A wired remote shutter connects directly to your camera via a cable. This option is ideal for photographers who prefer a direct connection and don’t mind a cable running between the camera and the shutter. Wired remotes are reliable and simple to use, with no need to worry about battery life or signal interference.
- Benefits:
- No battery required (powered by the camera).
- No signal interference.
- More affordable than wireless options.
- Tip: For long-exposure photography, a wired remote shutter ensures a steady connection and reliable operation, without concerns about wireless interference.

b. Wireless Remote Shutters
Wireless remote shutters offer more flexibility by eliminating the need for a cable. These remotes typically use infrared (IR) or radio frequency (RF) to communicate with your camera. Wireless models are especially useful in group photography, self-portraits, or when shooting from a distance.
- Benefits:
- No cables, providing more freedom.
- Useful for group shots, self-portraits, or action shots.
- Offers flexibility in camera placement.
- Tip: When using a wireless remote shutter, ensure that your camera is set up to accept signals from the remote, especially when using infrared models that may require direct line-of-sight.
c. Bluetooth Remote Shutters
Bluetooth remote shutters are the most modern option and work with cameras and smartphones that have Bluetooth connectivity. These remotes provide a seamless connection to your device, allowing you to control your camera remotely from your smartphone or a dedicated shutter release.
- Benefits:
- Direct connection to a smartphone or Bluetooth-enabled camera.
- Can trigger shots with both smartphones and cameras.
- Often has app integration for more control.
- Tip: Use Bluetooth remote shutters for seamless integration with smartphones in group or self-portrait photography, allowing you to control your camera from a distance without needing a dedicated remote.
3. Setting Up a Remote Shutter for Long-Exposure Photography
Long-exposure photography involves capturing light over an extended period, which is ideal for shooting scenes like light trails, moving water, and starry skies. The key to successful long-exposure shots is ensuring that the camera remains perfectly still for the duration of the exposure.
Here’s how you can achieve the ideal remote shutter setup for long-exposure photography:
a. Prepare Your Camera and Tripod
Stability is essential for long-exposure shots. Begin by mounting your camera securely on a sturdy tripod. Any vibrations or instability can result in a blurry image. Ensure that the tripod is on solid ground and that there’s no movement around it.
- Tip: Use a tripod with a hook at the base to hang additional weight (like a camera bag) to further stabilize the setup, especially in windy conditions.
b. Set the Exposure Settings
Before using your remote shutter, adjust your exposure settings to suit the scene you’re photographing. This typically includes lowering your shutter speed to allow enough light to reach the sensor, setting the aperture to control depth of field, and adjusting the ISO to prevent noise.
- Tip: For star photography or light trails, try a long exposure time of around 20 to 30 seconds. Use a small aperture (e.g., f/8 to f/11) for wide depth of field, and keep your ISO low (e.g., ISO 100-400) to reduce noise.
c. Use the Remote Shutter
Once everything is set up, use the remote shutter to trigger the shot. By avoiding physical contact with the camera, you minimize the risk of introducing camera shake during the long exposure. Depending on the type of remote you have, you can either trigger it manually or set a timer for automatic shots.
- Tip: Use the bulb mode on your camera, which allows you to keep the shutter open as long as you hold down the remote button. This is useful for very long exposures (e.g., capturing light trails or fireworks).
d. Check the Image and Adjust if Necessary
After taking your long exposure, check the image on your camera’s LCD screen. If it’s too bright or too dark, adjust the settings accordingly. You may need to tweak the exposure time, aperture, or ISO to achieve the desired effect.
- Tip: Take test shots to fine-tune your settings before committing to the full exposure, especially for low-light conditions.
4. Setting Up a Remote Shutter for Group Photography
Group photography presents its own challenges, primarily in coordinating everyone’s timing. A remote shutter allows you to capture the shot without needing to rush back to the camera and risk disrupting the moment. Here’s how you can set up your camera and remote shutter for the perfect group photo:
a. Position the Camera
Ensure that the camera is positioned at the right angle to capture everyone in the group. Make sure the composition includes everyone within the frame, with enough headroom and proper focus.
- Tip: Use the live view mode to preview the composition and ensure everyone is in position.
b. Set the Camera for Self-Timer or Remote Release
Depending on your camera’s features, you can either set it to self-timer mode or use the remote shutter to trigger the shot. If you’re using a wireless remote, make sure it’s synced with your camera, and you’re within range.
- Tip: If you want to ensure everyone is ready, you can set the self-timer on the camera (usually 10-30 seconds) and position yourself in the shot before it triggers.
c. Test the Remote
Before calling everyone into position, do a test shot using the remote shutter to ensure it triggers the camera correctly and that everyone can get into position comfortably.
- Tip: If your remote has a delay function, use it to give yourself extra time to join the group or make final adjustments.
d. Capture the Shot
Once everyone is in place and ready, use the remote shutter to capture the photo. Be sure to keep the composition in mind, ensuring everyone is in the frame and properly aligned.
- Tip: If you’re using a group posing app or guide, make sure everyone knows where to stand for the best result before taking the shot.
5. Conclusion
A remote shutter is an indispensable tool for photographers looking to improve their workflow and achieve flawless images, especially in long-exposure and group photography. By eliminating the need to physically touch the camera, you can ensure steady, stable shots and precise timing, whether you’re capturing light trails, starry skies, or the perfect group portrait.
Whether you use a wired, wireless, or Bluetooth remote, the setup and technique will depend on your shooting scenario. By taking the time to experiment with your remote shutter, adjusting settings for your scene, and ensuring the perfect timing, you’ll elevate your photography and achieve professional-quality results every time.

